


the index uses a mechanical approach to find service/immunity zones and assess their strength to ascertain the most important cost zones.
resistance and aid are the most well-known indicators. The ability to properly determine cost zones is essential for any dealer.
The index permits to avoid the subjectivity in drawing the zones of support/resistance.
ordinarily, support and resistance aren’t just amounts on the graph, but price zones, reaching which the price can turn around or move farther,
generating trading opportunities.
The indicator looks for current highs and lows to form support/resistance zones.
After building them, the indicator groups overlapping price zones (tip: do not raise the value of the maximum/minimum parameters too high. This will lead to the emergence of larger price zones).
Finally, the indicator evaluates the strength of each of the price zones.
The strength of a price zone is measured by analyzing the price behavior when the market reaches this zone.
A stronger price zone means that the price changes most actively within it.
The indicator analyzes the strength and weakness of price zones, displaying the strength level for each zone on the chart.
[spoiler title=”Read More…”]
A trader can apply a strength level filter to smooth out weaker price zones.
The following criteria are used to determine the strength of price zones:
- How many times has the price zone served as a price barrier in the recent past?
- How many times has the price used the zone as support or resistance in the recent past.
- How many times has the price actively reacted to reaching this price zone in the recent past?
By analyzing these parameters, the indicator determines the strength/weakness of each price zone.
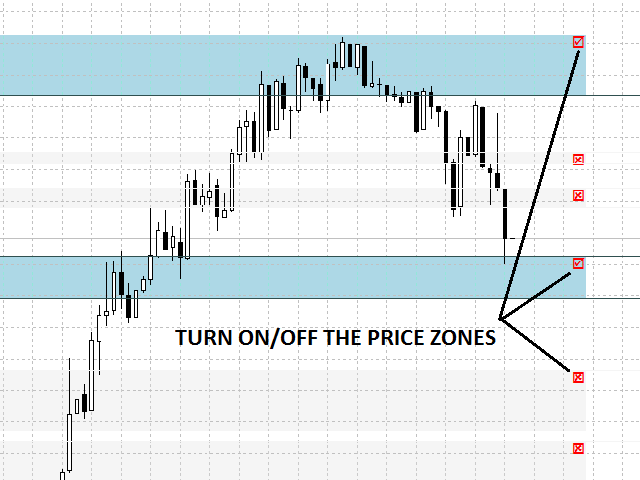
In addition to the automatic filter, the user can manually enable / disable certain price zones by clicking on the corresponding field.
- Displays support and resistance zones according to their strength level. When the filter is applied to the weak price zones are eliminated.
- It can be used in combination with larger timeframes.
- Auto-update of price zones as new highs and lows are formed, which protects the chart from cluttering with unnecessary lines.
- The strength level of each price zone allows you to compare them with each other and highlight the strongest ones.
- Works on any symbol and timeframe.
- It is triggered only when a new bar is formed.
- A small number of parameters that need to be configured.
- Buffers for Expert Advisor developers.
- Timeframe – the timeframe for the construction of pricing zones.
- Strength Filter-enable / disable the strength filter. When the filter is enabled, strong price zones are highlighted, and weak ones are smoothed out.
- Strength Filter Level – the filter level for distinguishing between strong and weak price zones (default is 8).
- Number of Tops/Bottoms – the number of recent highs and lows that the indicator looks for to build price zones (default is 5).
- Support Line Color – the color of the horizontal lines of the support zones.
- Resistance Line Color – the color of the horizontal lines of the resistance zones.
- Support Zone Color – the color of the support zones.
- Resistance Zone Color – the color of the resistance zones.
- Weak Color Zone – the color of weak zones.
- Checkbox Color – color of the price zone selection fields.
- Hidden Zone Color – the color of the hidden price zones (manual filter).
Available buffers:
- Buffers 0 and 3 are the lower price zone for resistance and support, respectively.
- Buffers 1 and 4 are the upper price zone for resistance and support, respectively.
- Buffers 2 and 5 are the strength level of the resistance and support zones, respectively.
The data about price zones are always at the beginning of the buffer. The remaining part is filled with zero values.
By themselves, price zones can not serve as entry points, but in combination with other indicators (candlestick patterns, correlations and oscillators) they become a powerful tool. This video demonstrates a trading strategy based on a stochastic oscillator.
https://www.youtube.com/watch?v=L2H1CW_MrBk
[/spoiler]