


Automatically send notifications to Telegram about any trading activity on your account. Sending to private messages, channel or chat is supported.
Usage scenarios:
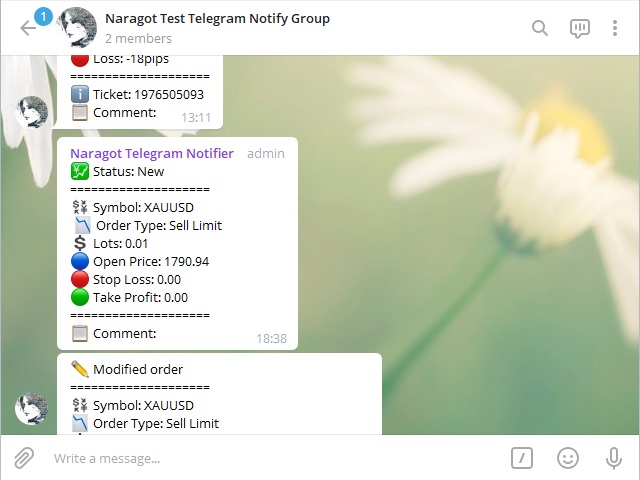
– Be always aware of what is happening – receive notifications about the opening of your positions on pending orders and closing on take profits or stop losses.
– Monitor the advisors – with any trading activity of the adviser, you will receive a message in Telegram.
– Social Trading – share your online trading with your colleagues.
– Sell signals – create a group or channel and additionally monetize your trading activity.
My Products:
Enter //api.telegram.org to the list of URLs allowed for WebRequest (remove the spaces before // – look at the screenshots, they make it clear how it should look in the settings)
Enter //api.telegram.org to the list of URLs allowed for WebRequest (remove the spaces before // – look at the screenshots, they make it clear how it should look in the settings)
Allow WebRequest for //api.telegram.org :
– In the MT4 Terminal menu: Tools => Settings =>> Advisors =>>> Allow WebRequest for the following URLs: =>>>> //api.telegram.org >>>>(remove spaces before // – I inserted them to comply with the rules of the MQL Market)
[spoiler title=”Read More…”]
Utility Settings:
– Bot Token – Your bot’s token (read below how to get it)
– Chat ID – ID of the group, channel or chat to which the bot will send messages (read below how to get it)
– Update timer in seconds – how often to check for new, modified and closed orders
– Magic Numbers To Watch – a list of magic orders that the utility will monitor. All/empty – all magic. 0 – manually opened trades. Example: 1,2,3,0 – the utility will report orders with magic 1, 2, 3 and manually opened
– True/False series, which allows you to fine-tune the information displayed in notifications
Creating a bot, we get a Bot Token:
1) In the Telegram, find the bot @BotFather. This is a built-in bot for creating bots
2) Write to him /newbot
3) Set the display name of your bot. It can be anything. For example, ‘Best trader online’
4) Set the user name of the bot, by which it can be found. It should end with bot and not contain spaces. For example, ‘Besttraderonlinebot’.
5) In response, you will receive from @BotFather the data of your newly created bot. It is necessary to remember the line following after “Use this token to access the HTTP API”. This is your Bot Token, which you need to enter in the settings.
6) Write to the bot /setuserpic and set the avatar for the bot
7) The bot has been created
We get the Chat ID to which the bot will send messages:
– If you want to send private messages
1) Write to the bot @getmyid_bot. In response, he will send you your Chat ID. This Chat ID must be entered in the utility settings.
2) Write a personal message to your previously created bot so that it can now write to you (bots are forbidden to write first)
– If you want to send messages to a group
1) Create a group
2) Add your bot to the group
3) Grant the bot administrator rights so that it can write to the group
4) Add the bot @getmyid_bot to the group. It will immediately send you your ID and Chat ID. The Chat ID must be copied to the utility settings.
5) Remove the bot @getmyid_bot from the group
– If you want to send messages to the channel
1) Create a channel
2) Add your bot to the channel
3) Grant the bot administrator rights
4) Write any message on your behalf to the channel and forward it to the bot @getmyid_bot: Right Click on the message => Forward Message =>> @getmyid_bot. In response, the bot will write your ID, chat ID and Chat ID of the channel from which you forwarded the message. Copy the last ID to the utility settings
[/spoiler]